Quantcast
Channel: culinaryxpress
Viewing all 102 articles
Browse latest View live

Chaas/ Masala Chaas/Buttermilk -Summer cooler to beat the heat, desi style.....

$
0
0
chaas
Indian summercan get really mean. Being closer to the equator means it is bound to get really hot. For a couple of days the heatwave here makes the place feel like a hot furnace and one feels like grabbing a bottle of cola. Though the chilled bubbly drinks seems enticing for a moment,  but no one can beat the heat better than this desi cooler named Chaas or Buttermilk.
chaas
Chaas or buttermilk is one of the popular summer cooler made with yogurt, all over India with some variations. Chaas is made by churning yogurt (curds/dahi) and cold water together in a pot, using a hand-held instrument called madhani (whipper). This can be consumed plain or seasoned with a variety of spices like asafoetida, fennel, ginger juice, curry leaves or coriander leaves .
 
In North India, usually salted chaas is taken whereas in other parts masala chaas and pudina chaas which is flavored with mint leaves is more popular. Chaas can be made from fresh yogurt, and the natural flavour of such Chaas is mildly sweet. This type of Chaas is very close to Lassi, with two major differences: Chaas is more dilute (with water) than lassi and unlike lassi, Chaas does not have added sugar.
Although Chaas can be made from fresh yogurt (curds/dahi), it is more commonly made at home from yogurt that is a few days old and has become sour due to age. That’s why Chaas has a tangy, slightly sour taste which is considered delicious. A pinch of salt is usually added to it for further enhancement of taste, and other seasonings can be added also.
In India, the consumption of Chaas is associated with two major benefits: cooling and improved digestion. Both of these properties are improved by the addition of spices. The cooling properties of Chaas, which helps people to rehydrate and beat the heat of the Indian summer, is greatly valued traditionally. Chaas is considered as a cool drink which keeps the body temperature down in summer. An earthen pot is used to prepare chaas and store it for a few hours before consumption. The use of earthen pot makes the chaas cool even in summer. In the extremely hot desert areas of Gujarat, Rajasthan and Andhra Pradesh, people consume chaas with salt after getting exposed in the sun because this cools the body and aids in rehydration. 
buttermilk
Cuisine: Indian
Preptime:10 minutes
Serves:4
INGREDIENTS:
  • 1 cup yogurt
  • 4 cups cold water
  • 1/4 tsp black salt
  • 2 tsp roasted ground cumin seeds
  • 1 green chilli finely chopped
  • 2 tsp finely chopped mint leaves

DIRECTIONS:
  • Combine all the ingredients together in a large jar and give it a good blend with your hand blender or just the conventional whisk. Yogurt needs to be broken down to a smooth texture and the mixture becomes frothy. If chilled water is not stored for use , make sure to refrigerate the prepared buttermilk for a while before serving.
  • Pour chaas in glasses. Garnish with mint leaves and serve chaas immediately.

  • Use chilled water preferably in this yummy spiced up butter milk. I Served it post lunch as an appetising and soothing drink to digest the heavy lunch we had.The whole work took me  not take more than 10 minutes.


Dhokar Dalna ( Lentil fritters in Potato & Tomato gravy)

$
0
0
Dhokar Dalna
Dhokar Dalna (Lentil fritters in Potato & Tomato gravy) is a traditional dish from the Bengali Cuisine that's purely satvik, which was originally created by the Bengali widows who were not allowed to eat onion or garlic.  Dhokas are the fried chana dal fritters that are lightly spiced and then simmered in a gravy made with tomatoes and ginger, spiced with cumin and coriander called Dalna, a cooking term that means any vegetables cooked in a medium thick gravy seasoned with ground spices, specially with Garam masala and a touch of ghee.The dhokas are such a delight and the Dalna is so fragrant that you wouldn't even miss onion or garlic in here.

Dhokar Dalna
Dhokar Dalna is a part of traditional Bengali cuisine and is somewhat similar to the besan tarkari my mother does at home. The only difference I found is that she made those from the gram flour and this one is done with soaking the daal itself. The other difference is that my mom used onion and garlic in the paste whereas this one is done without onion and garlic. 
The lentil paste is cooked with  a few flavorful spices to form a cake. Then that cake is cut into pieces and fried. Finally the fried lentil fritters are cooked in an aromatic gravy. The long process associated with the making of 'dhoka' will not hunt you when you actually tastes the dish which is so good and unique that you won't mind the effort put into it.
Dhokar Dalna
Making dhoka is easy but there are few things to pay attention to. When grinding the dal, use just enough water to reach a smooth consistency. If the mixture is too dry, the patties will crack when you fry them. For spicier dhokar dalna, supplement the recipe with green chilies. You can also mix finely grated ginger in the dal paste.
Cuisine: Bengali
Prep Time: 5 to 6 hrs preferably overnight
Cooking time:40 minutes
Serves:4

Ingredients for the lentil fritters:
  • 1 cup split gram (chana dal)
  • Water for soaking overnight
  • About 2 Tbsp water for grinding
  • 1 Tbsp ghee or oil
  • A pinch of pure hing powder
  • A pinch of salt
  • 1 tsp jeera seeds, dry roasted and ground
  • 1/2 tsp red chilli powder
  • Oil/Ghee for frying
Ingredients for the gravy:
  • 2 – 3 Tbsp ghee or oil
  • 1 Tbsp grated ginger
  • 1 small bayleaf
  • 1/8 tsp pure hing powder
  • 1/4 tsp kalonji seeds
  • 2 medium size potatoes, boiled ,peeled and mashed
  • 2 medium size tomatoes, pureed
  • water as needed
  • ¼ tsp turmeric powder
  • ½ tsp red chilli powder
  • 1 tsp coriander powder
  • 1 tsp jeera seeds, dry roasted and ground
  • 2 green cardamom seeds, lightly crushed
  • 1/2 tsp garam masala
  • 1 tsp salt
  • Fresh Coriander leaves for garnishing
Let us learn how to make Dhokar dalna:
  • Wash and soak the dal in plenty of water for about 5 to 6 hours or preferably overnight. Drain and keep aside. Add enough water to the dal to grind it in a food processor.
  • Heat up the ghee or oil over moderate heat and sauté the hing powder for about 30 seconds and then scoop in the dal paste. Keep stirring it until it thickens for about 5 minutes. As it will stick to the bottom of the pan, keep stirring. It’s ready when it pulls away from the sides and forms a solid mass. Now add the roasted jeera powder, chilli powder and salt. Mix well and spread the paste in a oiled platter. When it cools down, cut it into diamond shapes or squares.
  • Heat oil in a kadai and deep fry till light golden. Drain on a clean absorbent kitchen towel or paper and keep aside. 
  • Heat up the ghee or oil in a pot. When it’s, drop in the green cardamom, bayleaf  and once it starts to release its flavor, add grated ginger. When the ginger turns a  little dark, add the hing powder and kalonji seeds.
  • Add the tomatoes and fry until they start to stick to the bottom of the pan, and the ghee or oil begins to separate from them. Add mashed potato, coriander powder, turmeric powder, roasted cumin p[owder, red chilli powder and sauté  for a minute. 
  • Now pour in the water and salt. Cook until the gravy thickens. I have used mashed potatoes to make the gravy thick. Add the fried lentils to the gravy when it is somewhat thick. Remember that the cakes will absorb liquid; you may have to add some more water if the gravy dries up.So it is better to put the dhokas in the gravy just before serving.  
  • Add garam masala and serve hot garnished with chopped fresh coriander leaves.

Dhokar Dalna

Recipe adopted from  Sunday Times Newspaper and this recipe is being sent to Cooking from cookbook challenge for the month of March.


Khichdi - A Feast of the Lord

$
0
0
Khichdi

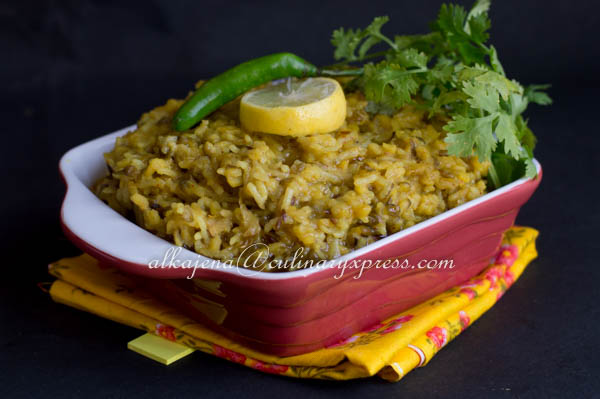
To many, the humble khichdi or khichri  or Khechudi,  evokes a medley of emotions, by the mere mention of the name, one either loves or hates it. Almost every state in India has it's own name for Khichdi, and has it as part of regular meals. It is called khichuri inWest Bengal, Adahengu khichdi( ginger-asafoetida khichdi) in Odisha which is a part of the famous Chapan Bhog of the Lord Jagannath temple, Pongal in Tamil Nadu, Bisi bele bath in Karnataka and Khichri in Bihar and UP.
Khichdi

This humble Khichdi which is a part of the famous Chapan Bhog of the Lord Jagannath in Odisha is cooked with rice, dal, seasonal vegetables and served with curd  to the devotees.This temple khichdi is the ultimate lesson in slow fire cooking where nine earthenware pots placed one atop another. The steam moves from one pot to the next, cooking the ingredients inside the successive pots.
Khichdi

   Ayurveda, the Indian wisdom of medicine, also recommends Khichdi for all body types as a cleansing regimen. Khichdi is also the first solid that babies are introduce to, Rice and Lentils are simmered till mushy, seasoned with Turmeric and salt, and fed to infants to introduce them to adult food as it is soft , easily digested, and has no spices. 

Khichdi

The khichdi  refers to a nutritionally balanced stew of rice and pulses, usually made with high quality grains, easily digestible lentils, fresh vegetables, exquisite spicing and homemade ghee, making it adequate, luscious and comforting.I, for one loves it and enjoy this soothing comforting bowl of earthy goodness. To cope with the blandness, khichri is usually paired with tangy and piquant partners, khichri ke char yaar, dahi, paapad, ghee and achaar.

Cuisine:Odia
Prep Time:30 minutes
Cooking Time:10 minutes
Serves:2

Ingredients:
  • 1 cup Rice
  • ½ cup  Moong Dal
  • 3 cups water
  • 1 tbsp ghee
  • 1 bay leaf
  • 2 green cardamom
  • 1/2 inch cinnamon
  • 1 or 2 dry red chilli
  • 1/4tsp of cumin seeds
  • 1/4tsp  asafetida
  • 1tbsp grated ginger
  • ½ tsp turmeric powder
  • salt as per taste
  • for garnishing
  • Fresh coriander
  • Green chillies
  • lime wedges
Khichdi
Let's Learn How to make this Khichdi:
  • Rinse and wash Rice and moong lentils together. Soak both of them for 30 minutes in water.
  • Heat 1 tbsp ghee in pressure cooker add cumin. When it starts to splutters then add bayleaf, dry red chillies, green cardamom, cinnamon,grated ginger and asafetida.
  • Saute for 10 to 15 seconds and add the drained the rice and moong lentils to the pressure cooker. Stir for a minute .
  • Pour 3 cups of water, turmeric powder and salt.
  • Close the lid tightly and pressure cook the khichdi on a medium flame for 1 whistle. Once the whistle comes, turn the flame to low and cook for 5 minutes. Turn off the heat and wait till the pressure is released and you can open the lid.
  • Serve the Khichdi with ghee on top  and garnish with coriander leaves, green chillies and a wedge of lemon.
  • This type of Khichdi taste  great with curd/yogurt, papad or pickles to balance the blandness.

 Khichdi
Sending this recipe to 33rd Foodie Monday Bloghop theme of celebration of everyday cooking with #Rice

Pulihora - Tamarind Rice

$
0
0


Pulihora -  Tamarind Rice
Pulihora or Andhra tamarind rice is often prepared during festivals and is offered as naivedyam to the gods. As Hindus consider turmeric powder a symbol of auspiciousness, this dish is cooked on almost all good occasions and festive days. Pulihora is also referred to as sour rice as Puli means sour taste .Cooked rice is seasoned with tamarind paste and other basic ingredients like curry leaves, peanuts, chilies and turmeric.  When this dish is made with tamarind then it is called PULIHORA and is called CHITRANNAM if made with Lemon. 
Pulihora -  Tamarind Rice
Pulihora stimulates the taste buds very nicely  with it’s sour, spicy, and salty taste as it contains ingredients like Turmeric, Green Chilies, Lemon, Asafoetida, Curry leaves. Pulihora, simply put, is rice flavored with a sour ingredient, tempered with mild spices, roasted peanuts & lentils but the main flavor comes from the tamarind.  The meal would feel incomplete without one of them. 
Pulihora -  Tamarind Rice
Cuisine: Andhra Pradesh
Prep Time: 30 minutes
Cooking Time: 20 minutes
Serves:2
Recipe Source: Here
Ingredients:
  • 1 cup raw cooked rice 
  • 1/2 tsp turmeric powder
  • 10 - 15 fresh curry leaves
  • salt to taste
  • large lemon sized tamarind (soak in a cup of hot water and extract pulp)
  • 1 tsp Jaggery
  • 1 tbsp channa dal
  • 1 tbsp urad dal
  • 1 tsp teaspoon mustard seeds
  • 1 tsp cumin seeds
  • 3-4 medium dry red chilli
  • 4-5 green chillis slit length wise
  • 1 1/2 tsps finely chopped ginger
  • 1/4 tsp asafoetida
  • 1 1/2 tbsp roasted sesame seeds powder
  • A fistful roasted peanuts
  • 3 tbsps oil

Pulihora -  Tamarind Rice
Let's learn how to make Pulihora:
  • Rinse and soak the rice for 30 minutes. Cook in such a way that each grain is separate and then  spread it to cool.
  • Sprinkle turmeric powder, salt, a tbsp of oil and few fresh curry leaves to the cooked and cooled rice and keep aside.

  • Heat the remaining oil in a cooking vessel, add the mustard seeds and let them splutter. Add dry red chillis, cumin seeds, channa dal, urad dal and fry for a minute till light brown. Next add the slit green chillies, ginger, asafoetida and few curry leaves and fry for a few seconds.

  • Add the tamarind extract and jaggery and cook till the raw smell of tamarind disappears for approx 5-7 mts. It will be a like a thick but flowing paste.Remove from heat.

  • Add the cooked tamarind mix and combine well such that it’s spread all over the rice. Adjust salt. Finally sprinkle the roasted sesame seeds powder and roasted peanuts and combine well. Let it sit for at least 3-4 hours for the flavors to set in.
  • Serve with yogurt and papad. 

This recipe has been developed as part of the Ugadi celebration event hosted by Jayashree who has a beautiful blog Evergreendishes.

Kulfi-The Traditional Indian Ice cream-How to make no cook kulfi using Bael fruit

$
0
0
kulfi

Kulfi is a creamy traditional Indian Ice cream that has been India’s best dessert on a stick. Kulfi recipe has similarities to ice cream in appearance and taste, however it is denser and creamier than the ice cream. Kulfi comes in various flavours and is quite popular in India, Pakistan, Bangladesh, Nepal, Myanmar and the Middle East. Unlike the Ice cream, kulfi is not whipped that is why it resembles a dense frozen dessert. Due to its density, kulfi takes a longer time to melt than ice-cream.
kulfi
Keeping the long hot summer season in mind, homemade kulfi recipe seems to be the best possible option. Come summer and every household would start making their kulfies in kulfi moulds, matkas or even in Ice cream trays to keep the ever demanding children busy during their summer vacations. The authentic Kulfi recipe calls for the use of full fat milk, sugar, cardamom  and chopped pistachios which  are added to the milk to make this rich frozen dessert.
kulfi
Kulfi is traditionally prepared by evaporating the flavoured milk via slow cooking until its volume is reduced by a half, thus thickening it, increasing its fat, protein, and lactose density.  This thickened milk has a distinctive taste due to caramelization of lactose and sugar during the lengthy cooking process. This mix is then frozen in tight sealed moulds or matkas to speed up the freezing process. Kulfi prepared in this manner is called Matka Kulfi.(Source-Wiki)
kulfi
The secret to this lovely dessert is the right amount of caramelization of milk which requires patience but the results are worth making it. Kulfi was on my to do list of desserts for this summer and what could have been a better opportunity than #NoCookNoBake theme for our 34th Foodie Monday BlogHop event.
kulfi
Keeping with the theme of #NoCookNoBake , I have decided to make this instant versions of  kulfi with condensed milk, evaporated milk , Mawa and cream and nuts like almonds and pistachios  which gave a nutty texture to the kulfi. The difficulty with this theme is that we cannot  use the gas stove and having access to tinned evaporated milk here in Bhubaneswar is a distant dream. To reach the right consistency of evaporated milk which is nothing but the slow cooked thickened milk, I have used chilled banana to thickened the milk. I have used mawa to give the kulfi a rich flavour and the abundantly available fruit in summer  which is instantly recognizable by its unique, sweet and aromatic flavour - bael fruit , a fruit whose sarbat and Pannas  is also believed to be good for the digestion. 
Bael, known as wood apple gets it’s name because of its hard wooden shell.The wood apple tree is native to India. It is also cultured in the southern parts of Asia. It is also found in some parts of Sri Lanka and Thailand. The rind of the woodapple must be cracked with a hammer to get the pulp out which can be eaten raw with or without sugar, or blended with milk and palm sugar syrup and drunk as a beverage, or frozen as an ice cream.The pale green with yellow, brown or light orange hi-lights of the hard covering of ripe bael fruits bears a contrasting shade to the orange pulp inside.
 
Recipe source:Own
Recipe type: desserts
Cuisine: Indian
Prep time: 15 minutes
Yields: 18 kulfis

Ingredients
  • 11/2 cups full fat milk( I have used Amul Gold)
  • 2 ripe bananas
  • 1 cup  sweetened condensed milk
  • ½ cup mawa
  • ½ cup cream (I have used Amul cream)
  • 1 tsp cardamom powder
  • 1 cup Bael puree
  • 1/4 cup chopped almonds
  • 1/4 cup chopped pistachios

Let's learn how to make this no cook kulfi:
  • First break the Bael fruit and scoop out the fruit pulp with the help of a spoon. Discard the skin.
  • Mash the pulp and add a cup of water to the pulp and sieve the soaked pulp from heavy strainer by pressing it with the help of spoon.
  • Remove seeds and discard the fiber. Collect the pulp and keep it for later use.
  • Chop the banana and keep in the deep fridger wrapped in clingfilm overnight. The Banana need to be firm for use.
  • Add the banana and chopped almonds in a blender and give short whisks so that it blends well.
  • Add the full fat milk and condensed milk together and whisk well.Add mawa, cardamom powder, bael puree and blend till smooth.
  • Add the cream and mix everything well.Add the crushed pistachios and give a good stir.
  • Pour the kulfi mixture in kulfi moulds or small silicon moulds so that you can take it out and serve conveniently.
  • cover with a lid with aluminium foil and keep in the freezer for the kulfi to set.
  • Once set, to remove the kufi, place the kulfi moulds under running water for some seconds or rub them between your palms. with a butter knife, gently remove the kulfi.
  • Serve the kulfi sprinkled with crushed pistachios.
kulfi

Sending this to our 34th Foodie Monday Bloghop theme of #NoCookNoBake recipes.


Aam Panna Recipe, How to make Aam Panna preserve for the summer

$
0
0
Now that the summer  has fully made its presence felt  scorching heat and soaring temperature, it is time to bring down the heat with some desi thirst quenchers- Aam Panna, the ultimate summer drink made from raw mangoes. All you have to do is boil the raw mango , take out the skin,  smash off the pulp, sieve the extract and relish in salty or sweet form. The ingredients used in the drink is supposed to be cooling for the body and making it the perfect summer thirst quencher.It can be bottled and stored in fridge for a month.
Aam Panna
Aam Panna has a sour and sweet taste, the sourness comes from the mangoes and sweetness from the sugar. The consistency of aam panna is quite watery. Keep tasting and add water according to your preference. This ultimate summer drink  prevents heat strokes and keeps the body cool as the raw mangoes are a good source of Vitamin C. The presence roasted cumin powder helps in digestion and Mint helps in keeping body cool. Presence of rock salt helps in controlling blood pressure .
Aam Panna
Recipe source: Own
Prep time: 30 minutes
yields: 2 bottles
Aam panna preserve
  • 750 gms raw mangoes( Approx 3 large raw mangoes)
  • 1 cup water
  • 1 cup sugar
  • 2 tbsp freshly roasted cumin
  • ¼ cup fresh mint leaves
  • Black Salt to taste
  • 1 medium size Lemon
  • mint leaves for garnishing
  • shredded raw mangoes for garnishing
  • Ice cubes as  required
Aam Panna

Let's learn how to make Aam Panaa
  • Dry Roast cumin seeds until lightly roasted and  pound with a pestle and mortar until coarse powder formed.Keep aside.
  • Pressure cook  the mangoes with 1 cup water for 2 whistle . Turn off the gas and let it cool. Leave the mangoes to cool till they are at a temperature where you can handle them. Peel off the skin of the mangoes, take out the pulp and discard the stone.
  • Add the mango pulp to the blender and blend it till you have a smooth purée.
  •  In the mean time, grind the mint leaves, sugar, salt  in a small blender jar.
  • Add ground mint ,sugar and salt paste along with the ground cumin powder to the mango pulp and squeeze lemon juice to it and mix well.
  • Store in a airtight jar in the refrigerator to be used when needed. You can store this upto 1month in the refrigerator. 
Aam Panna
  • To make Aam Panna, take 1 tbsp from this paste and mix with a glass of chilled water to make the panna. Adjust salt and sugar after diluting and serve with some freshly grated raw mango and mint leaves on top.

Aam Panna


Chuin -Aloo –Baigan-Badhi- Tarkari( Drumstick-Potato -Brinjal in mustard sauce)

$
0
0
odiacuisine
The cuisine of Odisha has a distinctive rusticity in it which has not withered with the passage of time. A typical main course consists of rice along with dali( daal), bhajja( Bhajji),tarkari( curry), bharta (mashed vegetables), ambila/sakara (sweet and sour preparation) and Mitha(dessert) that always makes it the most sought after food in any odia household. But unfortunately odia cuisine has not got it’s due share in the limelight as compared to it’s neighboring counterparts. There are plenty of such odia delicacies which needs to be brought forward for the entire world to see. Mustard oil, besara (mustard seeds pounded with garlic), panch phutana (panch phoron) are the three important ingredients in odia cuisine. 
odiacuisine
Tarkari is a generic term mostly used in odia homes for vegetables and meat in gravy. The gravy may be thick or thin ,spicy or bland as per the dish cooked. The thinness of the jhola(gravy) makes the dish light on the palate and demands expertise to raise it to a level distinct from water.This is a humble effort on my part to bring to you certain flavorful classic odia dishes in a series of post which will make you understand the rich heritage of odia cuisine. Besara is a typical form of odia cooking which is prepared with mustard paste as the primary ingredient. Chuin -Aloo –Baigan-Badhi- Tarkari is a classic example of this type of cooking.
odiacuisine
Drumstick is called sajana chuin in odia, saijan in hindi, murungakkai in tamil, soanjhna in punjabi. There are many way to cook this drumstick and it is a common vegetable which is available in almost throughout the year. Drumsticks are rich in vitamins like B, C, K, manganese and protein and is very good for our heart and skin. It also helps to purify our blood and lowers blood sugar label.
Cuisine: Odia
Recipe Source: Own
Prep Time: 10 minutes
Cooking time:20 minutes
Serves:4

Ingredients:
  • 2 nos Drumsticks
  • 1 large potato
  • 1 medium tomato
  • 1 Brinjal
  • 5 to 6 nos garlic pods
  • 1 tbsp mustard seeds
  • 2 to 3 green chillies
  • ½ tsp turmeric powder
  • 8 to 10 Badi( Sun dried chunks of batter prepared from black grams)
  • 2 nos dried red chilli
  • 2 to 3 tsp of mustard oil
  • 1 tsp pancha phutana
  • salt to taste.
 odiacuisine

Let's learn how to make this curry:
  • Peel off the outer layer of drumstick (chhuin) and cut it into 2 inch pieces. Cut the potato and brinjal in wedges. Cut the tomato into long strips .
  • Soak the mustard seeds for 30 minutes and then grind the mustard seeds along with garlic pods and green chillies into a fine paste. Keep aside.
  • In a pan, add 2 cups water, salt, turmeric and the ground mustard paste and bring to a boil. Add  sliced potatoes first as it takes maximum time to cook and simmer.
  • Once the potatoes are half cooked ,add the sliced brinjal and drumstick.Keep a watch on the drumstick so as not to overcook the drumsticks . in the last add the tomatoes. Take out from heart and keep aside.
  • In another container, heat oil. Add panch phutan, dry red chilli and as soon as the panch phutan stops crackling, add the boiled vegetables and bring to boil.Take out from heat and before serving add the fried Badi and coriander leaves.
  • Serve hot along with steamed rice.

odiacuisine


Shikanji: how to make Nimbu Shikanji

$
0
0
Traditionally, Shikanji is a spiced lemonade, which has lemon juice, roasted cumin powder, mint and black salt. It is so refreshing with  loads of vitamin C. Shikanji is always made with fresh lemon juice, sugar and spiced with some black salt and roasted cumin powder to get a  sweet and salty lemony drink. Use of black salt  in shikanji  gives it  a punch and Mint the much needed cooling for summer.
Limes are known as nimbu in India which is the best source of vitamin C. Lime juice in summer acts as a best coolant to our body. Having this desi drink in place of cold drinks and other aerated drinks, is the best possible solution to beat the scorching heat this summer. As it is free from saturated fats and preservatives making it a best form of drink for all. lemonade is easily available in all the fruits stall in the market. while travelling to office, I see a  number of vendors who sell these drinks on the roadside. You can also make this  shikanji at home instead of drinking it outside.
Nimbu Pani or Lemonade is very commonly interchanged with Shikanji, but there is a difference between the two. Lemonade or Nimbu pani is a mixture of lemon juice, water, sugar and a pinch of salt. Whereas Shikanji is made when spices like black salt, roasted cumin powder, black pepper powder and black salt is added to the basic lemonade.If you are making Shikanji for  fasting during Navaratri, replace the black salt with rock salt or Sendha namak.
Cuisine: North Indian
Recipe Type: Beverage
Prep Time: 5 minutes
Serves:2

Ingredients:

  • 2 tbsp lemon juice
  • 2 glasses of chilled water
  • 4 tbsp powdered Sugar 
  • 1 tsp roasted Cumin Powder
  • 1/2 tsp Black Salt
  • A pinch Black Pepper Powder (optional)
  • A few Ice Cubes
  • Mint leaves for garnish
 Let's learn how to make Nimbu Shikanji: 
  • Combine the lemon juice with black salt, powdered sugar, roasted cumin powder, pepper powder in a bowl.
  • Add two glass of water and mix everything well.
  • Add Ice cubes and Pour equal quantities of the mixture into individual glasses.
  • Garnish with mint leaves and lemon wedges. Serve chilled.
Sending this Shikanji recipe to our #35th Foodie Monday Bloghop theme of #Navaratrispecial.


    Sattu ka Panna - Celebrating Maha Bisubha Sankranti

    $
    0
    0
    Panna
    Pana Sankranti or Maha Bishubha Sankranti is celebrated as the Odia New Year.This day marks the beginning of the New Year in the traditional Odia calendar.Pana Sankranti, like all other new year festivals, is the celebration of the end of the old year and the beginning of new. People pray to God at the beginning of the year so that the new year brings joy and happiness to everyone's life. Farmers pray for a better harvest and good rain. Hence Pana Sankranti is a grand celebration in Odisha and people participate in the celebrations with great enthusiasm.This day is also known as Jala Visuva Sankranti which is the first day of the Baisakha month.
     
    There is an interesting story of Maha Bishubha Sankranti associated with Bhishma in the Mahabharata .‘Bhishma after being defeated by Arjuna in the Mahabharata war was lying on a bed of arrows (Shara Sajya). Pandavas and Kauravas had assembled near him and he asked for some water. Then Arjun aimed an arrow in the ground and from the crevice created by the arrow appeared Holy River Ganga to thirst the quench of Bhishma. Out of contentment and compassion Bhishma said that those people who would offer cold water to thirsty people on this day would not only be free from all sins, but also the departed souls of their ancestors as well as the Gods in heaven would be pleased. In remembrance of this day people in Odisha distribute water and a popular drink called Pana on this day.
     
    In Odisha, Bisubha Sankranti or Pana Sankranti festival is observed with great sanctity in various forms. On this day Chhatua (Sattu), Pana (sweet water), umbrellas ( Chhata), fans(made out of palm-leaves or bamboo-strips known as Barada patra Binchana) and Paduka (wooden slippers or Kathau) are offered to Brahmins and the poor people. All these are the remedies for the scorching Sun. 
    Water as the vital source of life becomes more symbolical in another ritual of the festival.Above the Tulasi plant- which is a must in every Hindu household of Odisha, a shed is prepared with branches of green leaves and a small pitcher filled with water is suspended with a rope hanger. Beneath it a small piece of straw which is fixed to a hole in the pitcher through which water is drained drop by drop on the Tulasi plant. This is called ‘Basudhara’ (the stream of the earth). Here, Tulasi plant symbolizes the human life and it is to be saved from the scorching sun by resting in the shed and taking enough water.
    Pana Sankranti
    This act symbolically represents that water being the most important constituent for sustaining life in the earth, should be provided to all in the month of summers.A special drink called Pana, prepared from the mixture of Bael fruit and yoghurt is offered to the Tulsi plant on this day. Besides this a pana made with a mixed chatua or sattu is prepared and offered to the deity on this day.
    Sattu

    Sattu ka Panna is an energizing drink that not only quenches our thirst but also protects us from the intense summer heatSattu was originally known as Sat-Anaj(seven cereals, millets and pulses). All across the states of Bihar, Jharkhand, Uttar Pradesh and Odisha,  Sattu is eaten daily in various forms.There are two versions of sattu drink – meetha (sweet) and namkeen (savory). Sattu a ghol is a salted version where black salt, black pepper, roasted cumin powder, lemon juice and mint leaves are used.In Odisha we mostly use the sweeter version of this drink named as Sattu Panna . 

    Cuisine: Odia 
    Prep time:10 minutes
    Serves:4
    Ingredients:
    • 1 cup Chatua or sattu
    • 1/4 cup grated coconut
    • 2 nos of ripe banana mashed
    • 1/2 cup jaggery
    • 1/4 cup yogurt
    • 1/4 cup chena
    • 1 tsp grated ginger
    • 1/4 cup chopped mango
    • a pinch of black pepper powder
    • a pinch of salt
    • Ice Cubes
    • Mango slices for garnishing
    • chilled water as needed

    Sattu
    Let's Learn How to make Sattu Panna:
    • Take equal quantity of wheat, green gram, Rice, Peanuts, Chana dal and dry roast them on slow heat till brown separately and keep aside to cool.Once cool, grind them along with 3 to 4 green cardamoms to a fine powder and store in an airtight jar to be used later. Or else you can buy Sattu powder available in the market and do this recipe.
    • Now in a mixing bowl, add chena, mashed banana, grated coconut, jaggery,grated ginger, chopped mangoes, salt, pepper powder and mix well. 
    • Add the chatua powder or Sattu to it and mix well. At this point it will be too dry. Add 2 glass of chilled water and make it a little runny.Taste the sugar level, if needed add more jaggery.
    • Keep this Sattu panna  in the refrigerator till serving. While serving put ice cubes on tall glasses and pour this drink over it.
    • Garnish with grated coconut and raw mango slices and serve chilled.
    Panna


    Mango Pomegranate & Tender Coconut Salsa- How to make easy Salsa Recipe for Summer Picnic

    $
    0
    0
    Every summer has  a  story. With the mercury rising here, it brings with it sweet memories of my childhood, when we would wait for the summer vacation to start so that we can visit our grandparents home. Though I never had a chance to meet either of them as they had passed away before I was born, but the stories I heard from my mom about them have still in my memories. Holidays at that time would mean loads and loads of mangoes, coconut water and sugarcane juice and playing in the huge backyard.
    Back to present, even some years back, the weather here is so pleasant that we would drive to the nearby beaches, enjoys some great food and come back by evening. By the way, let me tell you, the sunset is awesome, we would never feel like coming back from there. But now a days the soaring heat and studies are keeping us most of the time indoors. 

    There is something exciting about a picnic, which nobody can deny. We usually go for winter picnics where the food is lavishly cooked and there is no packed food concept. But Summer picnics occur at the height of the fresh fruit and vegetable season. And the more colorful produce you add to your menu, the healthier the meal could be. So for this week’s theme of #GetSetPicnic of Foodie Monday Bloghop, I decided to make the most use of the bounty of the season and fill our picnic basket with luscious summer produce to make the most loved mango Salsa with pomegranate and tender account.
    I have always been attracted to try this mango salsa but somehow it could not reach my blog.  I am a bit crazy as far as mangoes are concerned and love eating and buying them, to top it all, my parents send me my share of mangoes from home every year without fail. So I am always spoilt for choices. I have already tried the Aam Panna with the raw mangoes, Sweet & Sour Mango pickle with raw shredded magoes as condiment, Raw mango Rice Mango, baked Mango yogurtand Salsa was one of the mandates to try last year. I love the idea of mixing up the sweet, salty and spicy flavours of summer fruits and  cannot wait to taste the texture that the soft pulpy mango, tender coconut  and the crunchy onions and pomegranate  would bring together. Do try this recipe before the mango season is officially over.

    Salsas  always go well with a platter of Chips, Tortillas and even with Papads khakras, which are a slightly healthier version when compared to chips. I prefer the Mango salsa the most for it’s perfect burst of flavors with the sweetness of mangoes which is balanced with the acidity from lemon and the heat from the chillies but you can make various salsa varieties with fruits and vegetables during their respective seasons. I have used the 'Banginapally' variety of mango which is flooding the local market now to prepare my mango salsa, but you can use any variety of mango to make this .
    Cuisine: Mexican 
    Prep time:15 mins
    Serves: 4

    INGREDIENTS
    • 2 large ripe mangoes, peeled, diced
    • 1 cucumber dices
    • ¼ cup pomegranate seeds
    • flesh of 1 tender coconut cut in one inch strips
    • ½ cup red onion, chopped
    • ¼ cup coriander leaves chopped
    • 1 chilli  finely chopped
    • Juice of 1 lime
    • Black salt to taste

      
    Let’s learn how to make this Mango Salsa:
    • Dice the mangoes and cucumber and keep aside. Deseed the pomegranate and take out the flesh of the tender coconut.
    • In a large bowl, combine diced mangoes, cucumber, chopped onions,pomegranate seeds, tender coconut, chopped chilies and chopped coriander leaves.Add lime juice and salt to taste. Mix well.
    • Let this sit for 10-15 mins for flavors to mingle together.Serve it with papads or chips.
    • For outdoors, scoop them in paper cups and serve it with scoop type chips or papads .

    Go ahead enjoy your Summer with so much of  fun and have this delicious Mango salsa to complement the lovely weather.


    Buta Dali Aloo Kakharu Tarkari – Chana dal with potato and pumpkin curry

    $
    0
    0
    Buta Dali Aloo Kakharu Tarkari – Chana dal cooked with potato and pumpkin is a a very sought after dish in every odia household. This daal is liked by all for it’s amazing taste of spicy lentils blended with sweetness of pumpkin. It is a nutritious and a wholesome dish which goes very well with rice or poori. This daal is prepared with Buta dali or Chana daal or Bengal gram as popularly known as along with bay leaf, potato, pumpkin , ginger and coconut mostly on festive occasions and does not include onion or garlic in it. This simple no onion garlic aromatic daal is easy to make and taste absolutely divine.
    This tarkari made out of Bengal gram is quite different from the other lentils prepared in rest of the country. Buta dali or Bengal gram is a little hard compared to other daals which when cooked holds it’s shape better than other lentils.The use of potato and pumpkin in this daal along with the richness of coconut makes the daal creamy and luscious and makes your dining a never to forget affair of odia traditional cuisine.
    Now if you want to cook this simple, extremely tasty, authentic odia dish on a week day or specially for Sunday lunch for your family and friends, donot wait too much, go ahead and check this recipe below. This daal goes extremely well with Pooris  or rice and serve with a sweet kheer as side dish.I have literally grown up eating this daal prepared every alternative day as we have a tradition of not eating non veg food during 4 days a week. Every time I prepare this daal, it reminds me of home and of childhood.

    Cuisine: Odia
    Prep time: 30 minutes
    Cooking time: 10 minutes
    serves:4

    Ingredients:
    • 1 cup Buta daal (channa daal)
    • 1 cup pumpkin  diced
    • 1 large potato diced
    • 1-inch ginger grated
    • 1 tomato chopped
    • 1 tsp cumin seeds
    •  2 to 3 dry red chillies
    • 1 tsp Roasted cumin and dry red  chilli powder(3 teaspoons cumin seeds
      8-10 dried red chillies)
    • 1 tsp turmeric powder
    • 1 tsp ghee
    • 2 tbsp grated coconut
    • 1 tsp sugar
    • Chopped coriander and coconut  to garnish
    • Salt to taste

    Let's Learn how to make this recipe:
    • Dry roast the cumin seeds and red chilies for the cumin chili powder  till you get the aroma. Care should be taken not to over roast and burn the seeds.Grind it and store it in an airtight container.
    • Wash and cut the potatoes in cubes along with the pumpkin and keep aside.
    • Soak the Buta dali for 30 minutes.Wash Buta Dali and bring to a boil along with potato, pumpkin, salt and turmeric in a pressure cooker up to one whistle. Do not overcook the daal.
    • Heat ghee in a pan. Add cumin seeds , dry red chiilies and bay leaf .When they start to splutter, add grated ginger and stir for a minute.  Add chopped tomatoes and cook till done.
    • Add the boiled dal to the above masala, grated coconut  and simmer for few minutes. Garnish it with cumin and chilli powder and chopped coriander leaves and chopped coconut .
    •  Serve it with Puri or Rice. The consistency of the dish is a personal preference. So add water accordingly and enjoy.


    Wood apple Tamarind Aquafresca- Fruity Refreshing drink for Summer

    $
    0
    0
    Agua fresca
    This light, refreshing non-alcoholic drink served throughout Central America, Mexico, and the Caribbean, as well as Mexican cafés  are made by combining fresh fruits, grains, seeds, with sugar and water.One of the best way to enjoy fresh fruit is in agua fresca form. Agua frescas are nothing but refreshing fruit drinks made with fruits , water, lime juice and a bit of sweetener.
     Agua fresca
     I am sure you must be familiar with bael or woodapple pana if you have roamed along the streets in Bhubaneswar on a hot Summer day. Since childhood I am used to having the Bela Pana my mother used to offer us, more than the taste, her recipe is about using the bael fruit for the health benefits. I have given the traditional Bela Pana a modern twist suiting to our palette,if you have seen it but never had it before, you must try it once.

     Cuisine; Mexican
     Serves: 4

    INGREDIENTS :
    • Pulp from 1 medium size Wood Apple( Bael /Bela)
    • 2 tbsp tamarind pulp
    • 4 tbsp jaggery 
    • Juice of one Orange( optional)
    • 1 tsp Black salt / kala Namak
    • 1 tsp roasted cumin powder
    • 4 to 5 crushed mint leaves
    • 4 glasses of Chilled water
    • Ice cubes to serve
    • oranges wedges for garnishing

    Agua fresca
    Let's learn how to make this Agua fresca:
    • Crack open the Wood apple, scrap out its entire pulp using a spoon into a glass bowl/vessel.
    • Fill up the bowl with 2 glasses of chilled water till the entire pulp is covered in water. Mash the pulp so that it completely dissolves into the water. Use a large strainer and strain the entire thick pulpy wood apple juice into a larger bowl, you may need to stir and press down the pulp with a spatula to completely extract the juice.
    •  Discard the remaining seeds, fibers etc left in the strainer.
    • Add the jaggery,tamarind, mint leaves, roasted cumin powder and the remaining chilled water. Stir well, you may pulse it in a blender for a smother consistency.
    • Stir in the orange juice and black salt, you may keep in the fridge for a couple of hours before serving.
    • Pour into serving glasses and garnish with fresh mint and a slice of orange with loads of ice.


    Agua fresca

    Agua fresca

    Vegetables in Hot Garlic Sauce- Learn how to make this simple Indo-Chinese recipe

    $
    0
    0
    Chinese
    Indo Chinese cuisine is the adaptation of Chinese seasoning and cooking techniques to Indian tastes through a larger offering of vegetarian dishes. This type of cuisine is said to have been developed by the small Chinese community that has lived in Kolkata (formerly Calcutta) for over a century. ( Source: wiki) .
    Simply put, Indo Chinese cuisine aims at catering to our desi palette with an array of vegetarian and non vegetarian dishes. There is a huge difference between the authentic Chinese recipes and the Indo Chinese  version of it. The Cantonese cuisine is sweet, Sichuan is spicy, shangdong is crispy and tangy making the Chinese cuisine more diversified like Indian cuisine.

    Chinese

    When we think of Indo Chinese cuisine, Chilli Chicken, Chow mein, Fried Rice, Manchurian tops the list in our mind. The use of cabbage, bell pepper, mushrooms, garlic , baby corn are quite common ingredients in Indo Chinese food. These are the food we grew up with since our college days. This was pure luxury at that time. Indo-Chinese cuisine is probably the second most loved food in India, after it’s local street food fair.
     
     So when the theme for this week’s Foodie Monday Blog Hop was #IndoChinese recipes, what better way could have been to try this crowd favorite at home. This week was quite hectic and thinking of making an elaborate meal in this hot and humid climate was absolute no for me. So I decided to make this simple and quick vegetables in Hot garlic sauce and serve it with some Hakka Noodles .


    Cuisine: Indo-Chinese
    Prep time: 15 minutes
    Cooking time: 15 to 20 minutes
    Serves:4

    Ingredients:
    • 250 gms Button Mushrooms, cleaned and quartered
    • 1 large Green Bell Pepper/Capsicum, cut into 1 inch squares
    • 1 carrot, cut into long strips
    • 8-10 french beans, cut into 1″ pieces
    • 4-5 babycorns, cut diagonally into two
    • 1 large Onion, diced into 1 inch squares
    • 8 to 10 large  Garlic cloves, finely chopped
    • 3-4 Green Chillies, finely chopped
    • 1 inch cube Ginger, peeled and finely chopped
    • 1½ tbsp Dark Soya Sauce
    • 1-2 tbsp Red Chilli Sauce
    • 1 tbsp Sweet Chilli Sauce 
    • ½ tsp Sugar 
    • 1 tsp Pepper Corns powder
    • 1½ - 2 tbsp Corn Flour
    • 2 tbsp Oil
    • 3 to 4 cups water 
    • Salt to taste
    • Spring onions to garnish

    Chinese

    let's Learn How to make this recipe:

    • Dissolve corn flour in ½ cup of water and keep it aside until needed.
    •  Heat oil in a pan to smoking hot and add finely chopped garlic and green chillies. Give it a quick stir for half a minute and add diced onions.
    •  Stir fry the onions on high heat for a minute or two till the edges start to brown.
    • Mix in diced bell peppers and all vegetables along with finely chopped ginger and stir fry for a minute or two on high flame.
    • Add mushrooms along with soya sauce, red chilli sauce and sweet chilli sauce and stir fry for 2 minutes on high flame.
    • Next pour 3 to 4 cups of water and mix in sugar and salt to taste and bring to a boil .
    • Once the mushrooms are cooked through, add the corn flour dissolved in water little at a time stirring continuously to avoid forming of lumps.  Let it cook for 2 minutes on medium heat so that the vegetables remain  crisp and tender.
    • Turn off heat and garnish with spring onion greens.
    • Serve with Fried Rice or hakka noodles, it tastes awesome anyway.

    Chinese

    Sending this recipe to our 37th Foodie Monday Blog Hop theme of #IndoChinese Cuisine


    Badi Chura

    $
    0
    0
    One best thing about Bhubaneswar is that you get plenty of cool breeze in the evening, such a pleasant respite from the humid heat. With the summer on with full swing and the scorching sun, this recipe will do wonders to help you rejuvenate and beat the heat.Pakhala with badi chura is the ultimate desire for all during summer months in Odisha. Pakhala is the one we would have most often during summer.Also if you want to have a peaceful sleep after the day’s work, then you should go for this.Not to forget the onions and green chilly which add a zing to this recipe.  
    Pakhala is eaten in Odisha since time immemorial.A peculiar habit of Odia people are they think of food all the time. A typical meal constitutes of Rice, Dali, a gravy dish, a dry dish, a sour-sweet chutney, some crispy side dish and a proper dessert.One among the crispy side dish is Badi Chura. The dish is crunchy, crispy, savory that makes the lunch menu complete. Badi is a sun dried lentil dumpling which comes with many variations.


    Badi Chura is made by grinding badi with green chili, onion and garlic. It is basically a side dish. If you want to get its real flavour, then you must try this with Pakhala. Anyone and everyone can make this badi chura. It is a constant fixture in Odia meals, especially with pakhala. Badi is dried lentils and is usually made in fall and stored away for the year. It comes in handy as a quick side dish when you have to put a meal together in a jiffy. 

    Badi Chura

    Ingredients:
    • 15-20 Urad Dal Badis
    • 6-7 flakes of Garlic
    • 3to 4 baby Onions
    • 2 Green Chillies
    • 2-3 tsp of Mustard Oil
    • Salt to Taste


    Let's Learn how to make this Badi Chura:
    • Heat a pan. Roast the Badis.
    • Coarsely grind Garlic, Onion, Chillies, and Badis.
    • Add salt and Mustard Oil to the above mixture.
    • Your dish is ready. Serve it with Pakhala.
    If you want to see what a typical non veg pakhala thali looks like  do check it here. So entice your taste buds with some amazing, mouthwatering combo of Pakhala and badi Chura this summer.


    Bhapa Mach- Steamed Fish in Mustard sauce

    $
    0
    0
    After experiencing terrible heat for the last few days, today the wind is whistling outside, the sky dark and looming with a streak of lightning flashes once in a while. The stage is set for the rain. The wind, the rain, the thunder and the lightning ... all dance in perfect sync. And I watch outside like a curious child waiting for an answer.As I sit to pen down this recipe which I learnt a long time ago from my old Bengali neighbor who was a fabulous cook herself. Memories come flooding, how she makes me understand  this recipe in her characteristic motherly way. Wish I could meet her now to tell her how grateful I am for this as I don't know where she is now. 


    Bhapa refers to a dish of fish or vegetables, steamed with spices. Steamed fish is a traditional Bengali delicacy where Ilish /Hilsha Or Bhetki is steam cooked in a tangy mustard sauce. Mustard oil is used for an authentic taste and flavour. It is best enjoyed with hot steamed rice.But I have made this dish using Rohu, which is a freshwater fish as my son is averse to eating hilsa for its numerous bones. I still remember her advice to saute the fish lightly in oil before steaming it , when we use fresh water fishes such as Rohu or Katla.

    Cuisine: Bengali

    Prep time: 30 mins

    Cooking time: 20 mins

    Serves 2

    Ingredients:

    •  4 pieces Rohu Fish 
    • 2 tbsp Mustard Oil (for frying fish) + 1 tsp
    • 1 tbsp. Black Mustard seeds
    • 1 tbsp Yellow Mustard seeds  
    • 1 tbsp.Poppy seeds
    • 4 nos Green chillies
    • 1/2 tomato thinly sliced
    • 2 tbsp Curd/yoghurt 
    • Salt to taste
    • Fresh Coriander leaves, chopped


    Let's Learn How to make this recipe:
    •  Marinate the rohu pieces with turmeric and salt for half an hour.
    • Meanwhile soak the black, yellow mustard and the poppy seed in a little water for about 30 minutes.  After 30 minutes grind the soaked mustard and poppy seed along with 1 green chili and a little salt to a fine paste.

    • Fry the fish in hot mustard oil. Make sure you do not deep fry the fish. The fish should just be fried lightly to get rid of the rawness.
    • In a bowl, take yoghurt, above prepared paste , salt to taste. Mix together and keep aside.
    • First take a steel tiffin box or any steel vessel with tight-fitting lidin a single layer (not one on top of the other). Place the fish pieces as well as the gravy in this vessel and drizzle a little mustard oil over the bowl. Drop 1-2 slitted green chillies and thinly sliced tomatoes. Sprinkle some chopped coriander leaves. close the lid tightly and  steam it for 10-15 minutes.
    • Alternatively you may even bake in the fish in a preheated oven at 200 degrees C for about 15-18 minutes.

    • Remove from the steamer (or oven if used) and serve with steaming hot rice.


    Maah choliyan di daal (Slow cooked Punjabi Style Mixed Lentils gravy)

    $
    0
    0
    Maah di Dal, Kaali Dal or Urad Dal with skin – This Daal  has so many different names which only indicates how widely loved and popular it is.  Maah di Daal” is a famous lentil curry savored with rice or roti in the Northern parts of India. Made with black lentils, mainly Urad, and flavored with flagrant spices, is indeed a treat to be enjoyed. The typical Punjabi name for this daal is “Maah choliyan di daal” is almost same as kaali dal except it is made from split urad dal and chana dal. Maah means urad dal and chole dal means chana dal i.e. a combo of Urad dal (Maah/split black gram) and Chana dal (Choliyan/bengal gram). Traditionally this daal is prepared in earthen pots on a clay stove which impart an earthy taste and creamy texture to it.  
    Maah choliyan di daal is similar to Dal makhani in many ways as it uses the same lentils. However this daal is much lighter in terms of its preparation and gets most of its flavors from the slow cooking over hours.There are as many variations of Maah di Daal found on the internet — there is a great deal of confusion over what exactly goes into it. Some recipes use cream, others use butter, and most use ghee. But every version out there uses urad dal  as the lentil base but some use whole lentil, others use the split lentil, but with the black skin on. Some add a second lentil to it, usually chana dal, and yet others confuse it with its more famous cousin that’s often found on Indian restaurant menus, the luscious Dal Makhani, which has rajma or kidney beans added to it. The Chana dal  adds a bit more texture and a slightly different flavor to this daal.
    This daal  isn’t a commonly made Daal in eastern parts of the country . So my association with this daal before is with “restaurant” food .For a long time, I had Maah Di Daal in dhabas and restaurants only.I can completely understand if a lot of you will not associate with the way I have made this recipe, without a lots of butter or cream, but this is the way I have been making this daal on a regular basis without feeling guilty and keeping as much as the creamy texture and taste without going overboard with cream / butter.
     Lentils not only are an excellent source of protein for vegetarians , they also make low fat and low calorie meals and they are super tasty.Typically, the ginger-garlic paste is not added to this daal,but chopped and fried with lots of onions till everything caramelize together. The use of Kasuri methi (dried fenugreek leaves) really bring in an amazing flavour to this daal and not to forget the garnish of  fresh coriander leaves.
    Cuisine: Punjabi
    Prep time: 1 hour
    Cooking Time: 30 minutes
    Serves:2

    Ingredients:
    • ½ cup Chana dal (Bengal gram)
    • ½ cup Urad dal (I have used both whole and split)
    • 2 large tomatoes pureed
    • 1 large onions finely sliced
    • 2 to 3 green chilies finely chopped
    • 5 to  6 large garlic cloves, minced or crushed
    • ½ inch  ginger grated
    • 1 tsp cumin seeds
    • ½ tsp turmeric powder
    • 1 tsp coriander powder 
    • 1  tsp red chili powder
    • 3 to 4 black pepper
    • 1 bay leaves
    • 1 inch cinnamon stick
    • 2 green cardamom
    • 1 tsp Garam masala
    • 1 tbsp Kasuri methi
    • Salt to taste
    • Fresh coriander leaves for garnishing
    • 2 tbsp oil 

    Let's Learn How to make this daal:
    • Soak the two lentils together in hot water for almost an hour. Drain  rinse well and keep aside. 
    • Chop the onions, green chillies, ginger and garlic and keep them ready. 
    • Puree the tomato and keep aside.
    • Pressure cook the dal with turmeric and salt and 3 cups of water till 3 whistles. Turn to slow heat and keep on the gas stove for another 5 to 7 minutes. Turn off and let it cool.Open the cooker when the pressure eases off. Check the consistency of the dal, it should be thick and should get mashed easily when stirred.  
    • In a wide and heavy bottomed pan, heat the oil. Add cumin seeds in it and let them splutter. Add bay leaves, green cardamoms, cinnamon sticks, pepper and let it release it's aroma for 10-12 seconds. 
    • Add in chopped ginger, garlic and green chilies. Let them fry for half a minute on low flame. Take care not to burn them. 
    • Add in chopped onions, mix and let everything cook for 5-6 minutes till onions turn little brown in colour. Keep the flame on medium so they don’t stick and keep stirring frequently. Its an important step so have patience and let onion gets cooked properly. 
    • Now add in tomatoes, turmeric, red chilli powder, coriander powder and mix well. cook the paste, covered for about 3-5 minutes till tomatoes get mushy and cooked.
    • Once tomatoes are cooked and the raw smell of the spices is vanished, add cooked daal into this and mix well. Check the seasoning at this point and adjust accordingly. 
    • Let daal simmer for another 10-12 minutes. Add garam Masala and turn off the gas.
    • Garnish with fresh coriander leaves and sliced onions and serve hot with Naan, Paratha, roti or plain boiled rice.
    • This daal is traditionally made thick so you could eat it with chapatti or roti. If you want to have it with rice, adjust the consistency accordingly.

    Sending this beautiful Maah choliyan di daal to our 38th  Foodie Monday Blog Hop theme of # daldelight


    Note: 

    • I usually mix both the whole black daal and the split blak daal along with some rajma when I make this daal. If you like , you can skip adding rajma to this.
    • If you are cooking in a pan, soak both daals for at least 2 hours . Cook for 40-45 minutes covered with  a lid. And after mixing with the tadka, let it cook for another 15-20 minutes to reach it's creamy consistency.


    Sugar Palm Ice cream- How to make Ice cream at Home without Ice cream Maker

    $
    0
    0
    Ice Apple,Palm fruit, Sugar Palm, Tala Saja or Nungu is one such fruit you will find on every street corner during summer . Palm fruits or Sugar palm are called Taal Shaja in Odia, Nungu in Tamil, Thaati Nungu in Kannada, Thaati Munjalu in Telugu ,Tad gola in Marathi and Tad phal in Hindi. Palm fruit, is a refreshing treat for those languishing in this hot summers. Due to its cooling effect, this fruit is  known as ice apple. The fruit, which is available in abundance during the hot season, is rich in B vitamins, iron and calcium. The flesh of the this fruit is similar to litchi in texture and the taste is similar to fresh coconut.
    Palm fruit/Sugar Palm has a lot of health benefits. It provides a perfect balance of minerals and sugar for the body during the summer season. Ice apple or Sugar Palm is also rich in Vitamin A, B and C, Iron, Zinc, Phosphorous, Potassium and lots more which is good for the human body. Above all, this is a natural coolant food for the body during the summer season. Since it contains a lot of water, the best way to keep yourself hydrated during summer is with the help of this fruit. During summer, people generally tend to feel a lot more tired since they sweat a lot. The best way to fight fatigue is with the help of ice apple or Sugar Palm.
    Though there are a ton of summer fruits to eat during summer, ice apple or sugar palm is the best, since it has less amount of calories and high amount of energy.It keeps the glucose levels up and provides the right balance of minerals and nutrients to the body.It has a buff color covering that has to be removed to eat the ice apple inside. Ice apples have soft jelly like flesh beneath that contains minor amount of sweetened water inside it. Ice apples must be consumed at once when cut as it become rubbery when stored and the sugar inside ferments changing its taste.  
    Do try making a tender ice cream out of sugar palm at home in this summer and I am sure you will love it.My boy loves it and that's the best reward for me. The basic ice cream recipe has got it's makeover with this tropical fruit and the addition of chocolate sauce has taken it to a different level.  Go ahead and enjoy this yummy sugar palm ice cream.

    Recipe Type: Ice cream
    Setting time: 24 hours
    Cooking time:30 minutes
    Serves: Approx 400 ml of Ice cream

    Ingredients:-
    • 1 cup chopped sugar Palm flesh + extra for garnishing
    • 200ml Amul fresh cream
    • 100 ml Condensed Milk
    • ¼ tsp vanilla extract
    • Hot Chocolate for garnishing

    Let’s Learn How to make this interesting Ice cream:
    • Clean and wash sugar palm flesh. Chop them into pieces and blend into smooth puree.
    • Place the attachment of the hand blender and a deep  bowl  in the deep freezer for 15 minutes.
    • Whip the chilled cream till for 5 to 6 minutes. Add condensed milk , vanilla extract and sugar palm flesh puree and combined well so that no lumps remain.
    • Set the temperature of the freezer to highest.
    • Pour the mixture into an air tight container or aluminum tray, cover with an aluminum foil and put in the freezer for overnight or minimum 6 hours. Once it is set, remove from freezer and beat with the help of a hand blender till slushy.
    •  Pour the mixture again into an air tight container or aluminum tray and freeze again for at least 5 to 6 hours or till the ice cream sets. Repeat this process once more to get a smooth creamy ice cream.
    •  Scoop and serve with some chopped sugar palm  and drizzle some chocolate sauce over it to enjoy this exotic and tropical Ice cream. 


    Story of my Pickle Journey- A Mother's Day Post

    $
    0
    0
    pickles
    Every Summer  brings with it memories of my childhood  and the excitement in seeing the  bounty of fresh mangoes. So this time was no exception when a bagful of raw mangoes arrives from my home…..wait something seems missing this time.I thought to myself and frantically search for it. But it is no where in sight. I get panic and called my mom to know about it and her shrill voice brings me back to reality. It seems yesterday when I left my parent's place to start my own journey, and how time flies.  The phone call made me realize that my mother is getting older and the the gift she gave me every year in the form of pickles is going to be a distant dream. During summer, it is a common sight to find  freshly made pickles sun drying on the terrace of my home and bottled to be gifted to friends and relatives. 
    pickles
    I love raw mangoes and love to experiment with it but the enormous quantity of mango I got  from home this time , puts me in a dilemma what to make out of it. A day passed like that and suddenly an idea stuck me to try making Pickles out of it. That sounds interesting but there is a hitch, I have never made pickle in my whole life and donot know what goes into it as it was always my mother who makes it for me. I love challenges and this one is a tough one for me, but I had decided to learn making Pickles at home and gift it to my mom on Mother’s day….thus began my Pickle journey .
    pickles
    Indian pickles are known for it’s spicy, rich , oil based and explosion of flavours. The condiment that adds punch to the meals of plain rice and dal and the one that makes rotis and paratha taste better was almost indispensable in our home is the humble Pickle. Most of us have grown up eating delicious, crunchy and tangy pickles made by our mothers and grandmothers . These Pickles used to be very important item in our meal as it enhances the tastes of the meal. However, the art of pickle making at home is slowly fading with mass availability of commercially prepared pickles in the stores . But, it does not have the rustic characteristic of the home-made pickles.Despite being a time consuming process ,it is ridiculously simple. Yes, you do need patience to go through the process of sun-drying the ingredients, soaking them in oil and spices, and finally let them age in the sun for a few days to develop the flavours. But like they say all good things come to those who wait, the result is extremely rewarding.
    pickles
    Salt and oil play very important role in pickle making. Salt adds to the flavour, draws moisture and inhibits bacterial growth. Oil on the other hand acts as a barrier to prevent the ingredients from becoming dry and keeps them moist. Different oils and spices render different characteristics to the pickles. Hence, a mango pickle made in north India which mainly uses mustard oil is very different from that made in the south, where sesame oil is most preferred in the pickle making process.It is extremely interesting to see the various versions of pickles found throughout the country. The process of making pickle keeps on changing with the change in region, That is the reason why Aam ka Achaar in north India tastes completely different than we have in the southern states. The Pickle making process involves four vital steps:
    pickles
    Sun drying the fruits or vegetables:
    • Wash and pat dry the vegetables or fruits to be used for the pickle  with a clean paper towel. Chop them as per the required size and apply salt and turmeric to it and place in a  sterilized glass bowl and cover with a white thin muslin cloth and let it sun dry till all the water gets evaporated and the fruits/vegetables becomes tender but it should be crunchy also.
    Prepare the pickling spices
    • Dry roast on a medium hot pan the spices individually. Stir continuously while dry roasting so spices donot burn.  Mix together and spread on a plate to cool. Powder the spices coarse so that you can have your own pickling spice mixture.
    Prepare the oil
    • Pour the oil in a pan over medium heat and gently warm the oil. Watch closely till you see ripples in the surface. Turn the heat off soon as you see the surface shimmering and let the oil cool down to room temperature. 
    Putting it all together
    • Add the pickling spices and stir to coat every exposed surface. Then add the oil and stir several times again till all the oil is absorbed. Now put the pickle in a narrow mouthed sterilized glass jar and pack the pickle in and press the surface till a film of oil rises up and forms a protective barrier. This is very important in preserving your pickle from outside pollutants and fungal growth. Lid the jar and set it on a sunny ledge.                                  
        
      pickles
    What I learnt in the process of making Pickle:
    • Pickles and water are  Enemies:When you are making Indian style pickles, make sure that you have absolutely no water in the jars that you store your pickles in. 
    •  Some pickles mature after a while and even kept for years. The use of certain spices like asafoetida, turmeric and saunf (fennel) are used to help digestion. 
    •  Certain spices like clove, cinnamon and ginger are used for their warming properties. Cumin and cardamom are cooling spices, the variety is endless.
    • In the southern states, sesame oil is preferred, while mustard oil is preferred in northern states for making pickles.
    • Mustard oil can be added to the spiced pickles directly to have a strong and intense flavor of mustard oil in the pickle. But if you want less pungent flavor & taste to your pickle then, you have to warm or heat the mustard oil as heating reduces the pungency in the mustard oil and makes it sweet.
    • The sun-drying naturally preserves the vegetable, along with the spices.
    •  To prepare quickly however, vegetables may be cooked on stove top and additional preservatives like vinegar, sodium benzoate or citric acid may be used.
    • Commonly used spices include mustard,  fenugreek, chilli powdersaltasafoetida and turmeric
    • Indian pickles are usually made with oil as the primary preservative. 
    • Salt, turmeric and vinegar(optional)are also key ingredients in the preservation process. 
    • In some picklesthe vegetables/fruits are pre cooked , in other recipes it is sun dried.
      pickles

    Indian pickles are an important component to every meal as one or two different ones are included in the menu. In India there are thousands of varieties of pickles. Each state has its unique recipes, ingredients and tastes for pickles. No two pickles are the same since the recipes not only vary by state but by family.The only things they have in common are that everyone loves them and thinks the ones from their state are the best. Here is a peek into the various forms of Pickles prepared across India. 
    pickles
    In order to learn the art of Pickle making, I have prepared different types of Pickles using fruit( Mango) and a vegetable( drumstick) for this Mother's day as a gift to my Mother. Please come with me on this fascinating journey of knowing Pickle making procedures in different parts of India. Due to my shortage of time, I am not able to learn pickles from individual states but have asked some of my Bloggers friend to contribute to this write up and I am thankful to each and every one of them for their timely input.

    pickles
    Spicy Punjabi Mango Pickle recipe
    recipe type: side, pickles
    cuisine: North Indian, Punjabi
    Yields: 1 medium bottle
    Source: Here
    Ingredients
    • ½ kg  medium sized raw mangoes
    • 1.5 tbsp split fenugreek seeds
    • 2 tbsp mustard seeds
    • 2 tbsp fennel seed coarsely ground
    • 1.5 tbsp nigella seeds
    • 1.5 tbsp turmeric
    • 2 tbsp red chili powder
    • salt as required
    • mustard oil as required
    Let's Learn how to make this pickle recipe:
    • Rinse and pat dry the mangoes. Dice the mangoes and discard the seeds. Dry roast the Fenugreek seeds, Fennel seeds and coarsely ground them along with  Mustard seeds, Nigella seeds.
    •  Mix this spice powders, salt, turmeric and red chilli powder along with the diced mangoes. Mix well so that the spices get evenly coated on the mangoes.keep this spiced mango mixture in sunlight for 3-4 days covered with a thin muslin to protect from dust. After 3-4 days, add the mangoes to a jar.
    • Heat the mustard oil to boiling point and let it cool to room temperature and then pour mustard oil till covers the rim of the mangoes.Stir and mix well.Store the pickle in a dry and cool place for 3-4 days after which you can have the mango pickle.
    • Serve the mango pickle with your dal-rice, curd-rice, parathas & veggie dishes.
    pickles
    Sweet and Sour Punjabi Mango Pickle recipe
    cuisine: North Indian, Punjabi
    Yields: 1 medium bottle

    Ingredients:
    • 5  raw medium sized mangoes
    • 1 tbsp nigella seeds
    • ½ tbsp fenugreek seeds
    • 1.5 tbsp red chili powder
    • 1.5 cup powdered jaggery
    • salt as required
    let’s Learn how to make this pickle recipe:
    • Wash and peel the mangoes and then chop them, mix all the ingredients with the chopped mangoes.Check the seasoning and if required add more jaggery or salt or chili powder.
    • keep in the sun for 2-3 days till the jaggery thickens a bit and the mangoes tenderize a bit.Store mango pickle in a clean bottle or jar.
    • serve punjabi mango pickle with any Indian meal or parathas or have it plain.
    pickles
    UP Style mango Pickle:
    cuisine: North Indian, UP
    Yields: 1 medium bottle
    Recipe Source: My Sister In Law

    Ingredients
    • 3 to 4 Raw green mangoes each cut into 6-8 pieces
    • 2 tbsp Mustard seeds
    • 2 tbsp red chilli powder
    • 11/2 tbsp fenugreek seed
    • 2 tbsp fennel seeds
    • 1 tbsp ajwain
    • 1 tbsp nigella seeds
    • ¼ tsp asafetida
    • 2 tbsp turmeric powder
    • salt
    • oil

    Let’s learn how to make this recipe:
    • Wash and chop the mangoes and apply salt and turmeric to it and keep in the sun for 3 to 4 days to dry.
    •  After 4 days, add red chilli powder and coarsely ground mustard seeds to it and keep in the sun for one more day or till all the water gets evaporated.
    •  Heat oil in a heavy bottomed pan, add hing, methi powder,ajwain and nigella seeds and turn off the gas. immediately pour the achar mix to the mangoes and mix well.
    •  After mixing the achar , it becomes cool to handle. Now fill the achar in sterilized bottles, take care not to leave any air spaces in the bottle,for this you need to slightly tap the bottle against kitchen platform so that the achar settles down nicely leaving no air spaces,you will see the oil coming on top of the bottle in a thin layer.
    pickles
    Andhra style Mango Pickle
    cuisine: South Indian, Andhra Pradesh
    Yields: 1 medium bottle
    Recipe Source:Here

    Ingredients:

    • 1 tbsp mustard seeds
    • 1 tbsp red Chilli powder
    • 1 tbsp salt
    • 1 cup chopped mangoes
    • 8 to 10 garlic pods
    • 1 tsp fenugreek seeds
    • Mustard Oil as needed
    Let's Learn how to make this recipe:
    • Wash and Wipe the mangoes with a cloth and cut them into pieces.Clean the pieces with a soft cloth and spread them over a dry cloth while you work on the rest of the pickle preparation. 
    • Wash the pickle jars and sun dry the jar till completely dry with absolutely no moisture.
    • Sun dry the mustard seeds and grind the sun dried mustard seeds to a fine powder. Set aside.Peel the garlic and set aside.
    •  Take a large wide vessel or bowl and add red chili powder, mustard powder and salt and mix well with clean, dry hand. Add methi seeds, garlic cloves and 3/4 cup oil and mix well. 
    •  Add the mango pieces and mix well with your hands such that the mixture coats the mango pieces.Place the spice coated mango pieces along with some of the spice mixture and add to the jar. Any remaining spice powder should be added to the jar. Pour Oil on top and cover the pickle jar with the lid. Tie a cloth over the lid and keep it in a moisture free area up to 3day.
    • On the 4th day, open the pickle jar and use a clean dry ladle and mix the contents carefully. Taste the mixture and check if its salty. If required add more salt . Pour more oil on top as the pickle needs to be covered in thin layer of oil. Cover the jar with lid and tie a cloth over it. Let the pickle marinate for another 4 days.
    • After 4 days ,mix the pickle carefully with a clean and dry ladle. The mango pickle is ready for consumption.
    • Serve this pickle with hot steamed rice.
    pickles
    Kerala Mango Pickle:
    cuisine: South Indian, Kerala
    Yields: 1 medium bottle
    Recipe Source:Here

    Ingredients: 
    • 2 cups chopped raw mango
    • 2 tbsp salt
    • 1/2 cup garlic pods
    • 1/2 tsp turmeric powder
    • 2.5 tsp black mustard seeds
    • 1/2 tsp fenugreek
    • 1/4 tsp black peppercorns
    • 1/4 tsp hing
    • 3tsp red chilli powder
    • 2 strands curry leaves
    • 1/4 cup oil
    Let's Learn How to make this recipe:
    • Wash and chop the mangoes and add salt to the cut mangoes and set aside for 20 to 30 minutes.
    • Combine 2tsp mustard seeds , fenugreek seeds and makea coarse powder of it.
    • Heat oil in a pan and add mustard seeds, when they splutter, turn off the flameand add powdered mustard seeds, fenugreek seeds quickly and add red chilly powder, curry leaves and the mangoes.
    • Mix it lightly till all the spices are coated perfectly . Let the pickle cool down completely before pouring on  jar and store it with more oil.
    pickles
    Gujrati Mango Pickle Recipe
    Cuisine:Gujrati
    Yields: 1 medium bottle
    Recipe Source:Here

    Ingredients
    • ½  kg raw unripe green mangoes
    • ¾ cup whole fenugreek seeds
    • ½ cup split mustard seeds
    • ½ cup red chilli powder
    • 2 tbsp turmeric powder
    • ½ tbsp asafoetida
    • Salt
    • Mustard Oil as required


    Let’s Learn how to make this pickle recipe:
    • Grind the  fenugreek seeds to a coarse mixture.
    • Rinse the mangoes and then dry them with a clean kitchen towel. there should be no trace of moisture on the mangoes. chop the mangoes into bite sized pieces or cubes.
    • Take all the chopped mangoes in a mixing bowl or pan.add the coarsely ground fenugreek seeds and split mustard seeds.add turmeric powder, red chili powder, asafoetida and salt.mix very well with a clean spoon.now add this pickle mixture in a sterilized glass jar.
    • Heat the mustard oil, till it reaches its smoking point. switch off the flame and cool the mustard oil completely. add the cooled mustard oil to the pickle mixture.the oil has to float at least 2 inches above the top.close the jars tightly and keep them on your kitchen counter for 10 to 12 days, till the mangoes soften a bit and become tender. stir the jar after every 2 to 3 days with a clean sterilized spoon.
    • Once the mango pickle is ready, you can serve them. whenever the amount of oil becomes less on top, add some more oil.
    pickles
    Sweet & Sour Drumstick Pickle:
    Cuisine: Odia
    Yields: 1 medium bottle
    Recipe Source:My Mother's

    Ingredients:

    • 15 nos of drumstick cut into 3 inch long
    • 1tsp fenugreek seeds
    • 3 tsp mustard seeds
    • 20 nos of dry red chillies
    • 1 tsp fennel seeds
    • 100 gms tamarind
    • 100gms  sedless dates
    • 1/2 cup powdered sugar
    • 1/2 tsp nigella seeds
    • salt
    • oil
    Let’s Learn how to make this pickle recipe:

    • Wash and dry the drumstick and then chop into 3 inch long.
    • Heat 2 tbsp of oil and add the nigella seeds and the drumsticks. add salt and fry on high heat for 5 to 7 minutes.
    • Turn off the flame and let it cool.
    • in the mean time, dry roast the red chillies,fennel seeds and fenugreek seeds and grind to a semi fine powder.
    • Soak the tamarind and the dates for 30 minutes. Grind the dates to a fine puree and add the tamarind pulp to it.
    • Heat oil in  kadhai and pour the tamarind and dates puree along with the powdered spices and sugar and cook for 2 to 3 minutes or till the sugar melts and then add the drumstick pieces .
    • Mix properly and turn off the heat. let the pickle cool itself and then pour in to  jar and filled it with mustard oil to be relished later.
    pickles

    Odisha Sweet Mango Pickle recipe

    recipe type: side, pickles
    cuisine: Odia
    Yields: 1 medium bottle
    Source: My Mother's
    Ingredients
    • ½ kg  medium sized raw mangoes
    • 1.5 tbsp split fenugreek seeds
    • 2 tbsp mustard seeds
    • 2 tbsp fennel seeds coarsely ground
    • 1.5 tbsp turmeric
    • 20 red chilli powder
    • 1/2 kg jaggery
    • salt as required
    • mustard oil as required
    Let's learn how to make this pickle  recipe:
    • Rinse and pat dry the mangoes. Dice the mangoes and discard the seeds. 
    • Rub salt and turmeric to the mangoes and keep this mango mixture in sunlight for 3-4 days covered with a thin muslin cloth to protect from dust. After 3-4 days, the mango would have been dried properly .
    • Add the coarsely ground mustard seeds to the mangoes and sundry for one more day.
    • Dry roast the red chillies, Fenugreek seeds, Fennel seeds and coarsely ground them.
    • In a heavy bottomed pan , put the jaggery to melt completely, add the  spice powders along with the diced mangoes. Mix well so that the spices and jaggery get evenly coated on the mangoes.Turn off the heat and let it cool.
    • Heat the mustard oil to boiling point and let it cool to room temperature and then pour mustard oil till covers the rim of the mangoes.Stir and mix well.Store the pickle in a dry and cool place to be relished later.

    As I come to an end of my pickle journey , I would like to share my heartfelt thanks to some of my bloggers friend who have shared their links with me, which have helped me in understanding this Pickle making process. 
    Drumstick Pickle by Preethi Prasad


    Kanji- How to make odia/oriya Dahi Kanji recipe

    $
    0
    0
    Kanji

     Kanji is an authentic Odia dish that is quite popular in Southern part of Odisha which is  basically a soupy based dish with a unique sour taste. Normally Kanji is cooked during winter months when all the vegetables are abundantly available, but now  a days it is made throughout the year. Use of lots of vegetables along with the Curd makes this  a healthy dish by nature.
    Kanji
    Usually three types of kanjis are made in Odisha as told by my mother: pariba kanji( Kanji made with vegetables) , saga kanji( kanji made with leafy vegetables) and Sukhua kanji( Kanji made with dry fish). Kanjis are made with either Dahi as the base or Torani( water from the water rice or Pakhala) or Peja( the water from the cooked rice). In villages in older days when refrigerator was not there , the women folk of the villages used to keep little Torani with Peja in a container and keep adding the same everyday upto 7 to 8 days till the liquids gets fermented. After which they used to add salt, turmeric and sufficient water to the fermented liquid and cook with vegetables or dry fish to arrive at this spicy tangy soupy like dish.
    For this #Foodie Monday Blog Hop , the theme is #MothersDaySpecial and I have a hard time choosing a recipe to post as whatever I know about odia cuisine, it is from my mother only and she does not eat any other food than odia food. When I try to think what is my mother's favourite recipe, I realize all these years it is our choice which she took care of but never told what is her choice of food she wants to eat. For her we are her world and our choice has become her choice. So preparing a recipe with her favorite vegetable i.e drumstick comes to my mind. I have seen her making a lot of dishes with drumstick and recently I have made drumstick pickle for her also. I have decided to make Kanji which is a very rustic flavourful soupy things with drumsticks and its leaves for Mother's day keeping my mother's choice for simple and traditional food in mind.
    Kanji
    It is said ,If you have a drumstick plant on your garden ,you seems to have a doctor at home.  Drumstick increases appetite, help to reduce headache and diarrhea, purifies blood and excretes  toxins out of the body.  Drumstick leaves posses the  power of reducing the sugar level in the blood and it might be the reason for which  Sugar patients are recommended to take drumstick leaves to make the level of sugar normal in the blood. 

    Cuisine: Odia
    Prep time: 15 minutes
    Cooking Time:20 minutes
    Serves:4

    Ingredients:-
    • 1 cup,  curd
    • 3 tbsp gram flour
    • 1 tsp turmeric powder
    • Salt as per taste
    • 3 cups water
    • A pinch of Hing
    • 2 tsp Garlic-Green chilli paste
    • ½ tsp fennel powder

    Vegetables Needed:  
    • 2 nos of  drumsticks
    • 1/2 cup drumsticks leaves 

    For Tempering: 
    • 2-3 tsp Mustard oil
    • 1 tsp mustard seeds
    • 1/2 tsp fennel seeds
    • 2 Dry Red chillies
    •  Few Curry Leaves
    Kanji

    Let's learn how to make this recipe:
    • Combine together curd, water, gram flour(besan) and ½ tsp turmeric powder(haldi). Whisk well or blend it in a blender to a pulse to make a smooth lump free mixture.  Keep it aside.
    • Wash and cut the drumstick into 3 inch long and pluck out the leaves from the stems of the drumsticks leaves.
    • In a heavy bottom pan, heat oil. Add hing (asafoetida) and add drum sticks and it's leaves and sauté for 2 to 3 mins.
    • Add  green garlic paste chili paste, fennel powder. Saute very well.
    • Cover and cook for 2 to 3 mins.Reduce the heat to low.  Add the blended curd mixture stirring continuously to avoid curdling.
    • Add salt and allow it to boil. Keep stirring.Once it starts boiling, cover and simmer for 15 to 20 mins or till the drumsticks are well cooked.
    • Adjust the consistency and seasoning of the kanji as per your requirement and Cook for another 3 to 4 mins.
    • Heat oil in small pan. Add mustard, allow it to crackle.Add fennel seeds and curry leaves, fry for few seconds.Add broken red chilies, fry for another few seconds.Pour this tempering immediately over the prepared kanji and cover .

    • Serve this yummy and sour Kanji with any rice dish.


    Kanji

    This is going to be part of our #39th Foodie Monday Blog hop theme of #Mothersdayspecial 


    Lychee Mojito- A refreshing summer mocktail

    $
    0
    0
    mojito

    Mojito is a traditional Cuban highball consisting of white rum, sugar, lime juice, sparkling water, and mint. A mojito which does not have alcohol in it is a ‘virgin mojito’ and is categorized as a mocktail. Mocktails are those drinks which can be consumed by everyone who wants to relish flavorful drinks without adding alcohol to it.
    This Lychee Mojito  is just that subtle , sweet something you always wanted to linger over on a warm summer evening.Simply add some ice cubes , garnish with a lemon slice and few mint leaves and you are ready to beat the heat with a glass of refreshing virgin Lychee Mojito  .You can use fresh lychees and muddle them with the limes but it can be made with  lychee juice also. 

    lychee being  sweet and juicy treat, gives  a high content of water which keeps us being hydrated. Lychee is a great source of dietary fiber that helps in achieving efficient digestion. Lychee is known for its remarkable levels of Vitamin C content  which is a very essential mineral needed by the body for it to be able to defend multiple disease and illnesses on its own. Lychee is very abundant in strong antioxidants that remove harmful toxins in the body which triggers development of cancer cells.

    mojito

    Prep Time: 10 minutes
    Cooking Time/ Serving Time: 5 minutes
    Serves:2

    Ingredients:
    • 1 tbsp Lemon juice
    • 6 to 7 Mint leaves  
    • 3 tbsp Sugar syrup
    • 1 cup lychee puree + some for garnishing
    • Crushed Ice
    • lemon slices and few mint leaves for garnishing
          

         Let's Learn how to make this Lychee Mojito:
    • Prepare sugar syrup by heating 1 1/2 tbsp of sugar in 1/4 cup water on low to medium flame. Let the sugar dissolve completely. Allow to simmer for a little less than half a minute. Turn off the flame and bring the sugar syrup to room temperature.

    • Peel the Lychees and deseed them. In a blender make a puree of the lychees.
    • Take two serving glass, add 2-3 fresh mint leaves, a tbsp of sugar syrup and a little more than a tbsp of lemon juice. Use a spoon to gently crush or bruise the mint leaves.
    • Pour the lychee puree in it. Add 1 to 2 whole unseeded lychees in it and slowly pour chilled water into the glass till it almost reaches the brim and stir to mix.

    • Garnish with a slice of lemon, a small sprig of mint leaves and add 2 to 3 ice cubes in each glass and serve.
    • In place of chilled water you can also add chilled soda water for all that extra fizz.
    lychee mojito


    Viewing all 102 articles
    Browse latest View live